
Reduce Tiles: Precisely and safely reducing tiles is a vital skill that one needs to have when undertaking modern tiling initiatives. Whereas it does sound difficult, it’s typically one thing even inexperienced persons can deal with. Whether or not working with any tile, the precise instruments, methods, and security measures guarantee clear cuts, skilled outcomes, and minimal materials waste – that is the ultimate purpose of any house mission! This tile chopping information walks you through the step-by-step process, instrument choice, and best practices to assist both professionals and DIY lovers in executing exact tile cuts with confidence.
Reducing Tiles with Accuracy: Why It Issues
Often, as we all know, tiles are available in mounted sizes. Nevertheless, partitions and flooring of houses might have corners or change installations that don’t match the unique dimensions of the tile. Due to this fact, cutting tiles helps them fit perfectly into these spots. As with anything, tile chopping can be an exact job. If the accuracy is not maintained, the general visible attraction of the room can look off. Here is why you need to reduce tiles with utmost diligence and precision.
- Aesthetic precision: Clear, straight cuts without chipping elevate any setup, whether or not backsplash, lavatory, or flooring.
- Excellent match: Correctly-shaped tiles, round fixtures, or edges provide a seamless look.
- Environment-friendly utilization: Correct cuts cut back wastage and time spent re-cutting or adjusting.
Instruments Required
| Instrument | Greatest For |
| Handbook Tile Cutter | Straight cuts on ceramic/porcelain |
| Moist Noticed | Precision cuts on porcelain/stone |
| Tile Nippers | Small notches, curved cuts |
| Angle Grinder | Curves, L-cuts, onerous supplies |
| Glass Cutter | Scoring and snapping glass tiles |
Discovering and utilizing the Reduce Tiles right tile chopping instruments for a process that requires hard work, effort, and precision can cut down the load considerably. Prior data relating to which instruments would work on which sort of tile works properly to avoid wasting time and vitality.
Handbook Tile Cutter
This instrument is best suited for making straight cuts on ceramic and common vitrified tiles. It’s identified to allow clear traces utilizing a scoring wheel, followed by a snap bar.
Carpenter’s Tile Nippers
A tile nipper appears to be like like a pair of pliers and is commonly used to trim the smaller components of a tile. They are perfect for small notches and curved cuts, good for ending round pipes and irregular shapes – principally, they can be utilized to make curved shapes or tiny changes.
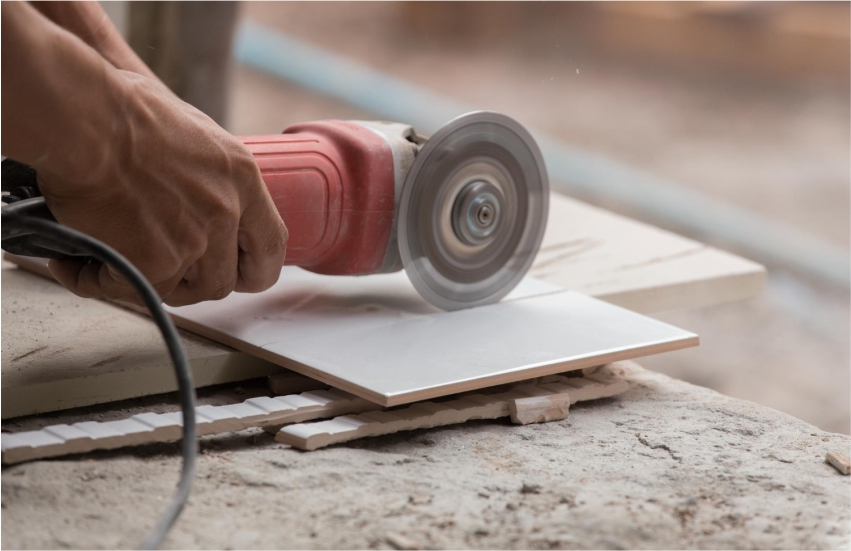
Angle Grinder with Diamond Blade
It is a movable and highly effective electrical instrument. It makes use of a spinning blade to chop by the tiles. The Reduce Tiles angle grinder is nice for straight traces, curves, L-shaped cuts, and getting by onerous ceramic or porcelain.
Moist Noticed with Diamond Blade
That is popularly often known as the gold commonplace for straight and curved cuts on ceramic, porcelain, stone, and large-format slab tiles. It makes use of water and a pointy blade to chop the tiles. The instrument provides clear, chip-free cuts.
Detailed Information For Tile Reducing
Step 1: Measure and Mark
Since every tile will occupy a particular area within the room, the primary and most vital step could be to measure the area where the tile is to be positioned. Utilizing a pencil or a tile marker, you’ll be able to mark correct traces on the floor of the tile. For intricate shapes, use stencils. Additionally, make certain to double-check the measurements.
Step 2: Select The Proper Instrument
Utilizing the precise instrument will result in environmentally friendly tile chopping with minimal waste. Please discuss with the desk above to find the right instrument and ensure you’ve the required safety gear, including goggles and Reduce Tiles gloves. Correct instrument choice and preparation won’t only make the method smoother but also decrease errors and enhance the overall quality of your tile installation.
Step 3: Save the Tile
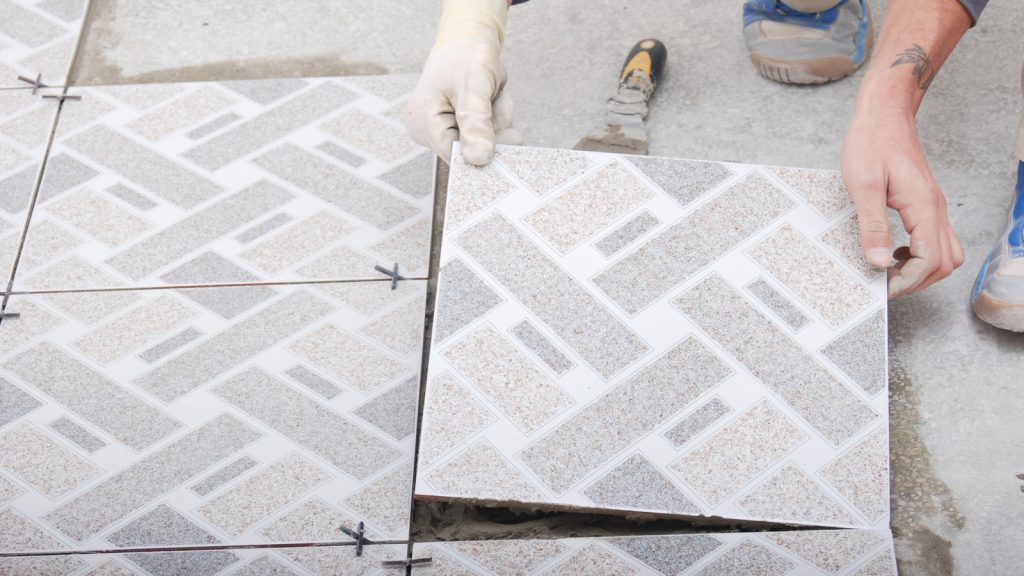
Don’t ignore this step. All the time place the tile on a secure and flat floor. For larger tiles, use clamps or a non-slip mat to prevent movement during tile cutting. Free tiles might result in slipping or shifting, leading to poorly or improperly reduced tiles that create ill-fitting and incoherent visuals.
Step 4: Make the Reduce
Comply with the rules of the instrument exactly. It will differ depending on the instrument you’re utilizing.
Step 5: Ease the Edges
Reduce Tiles. After chopping, use a tile file, sandpaper, or a rubbing stone to ease out any tough edges. This prevents accidents and ensures a comfortable match throughout setup. It additionally offers an elegant end
Ideas for Reducing Completely Different Tile Varieties
In case you are trying to do some DIY work, inspecting ongoing work in your house, or are simply inquisitive about how this trade works, listed here are some tile cutting suggestions that you should know to work properly with various kinds of tiles that have numerous textures and thicknesses.
- Ceramic Tiles – These are simpler to chop and work properly with guide cutters or moist saws. Use gentle strain when scoring to avoid breakage.
- Porcelain Tiles – Porcelain is denser and extra brittle. A moist noticed or angle grinder is the best instrument for chopping porcelain tiles without chipping.
- Vitrified Tiles – These are sturdy and waterproof. A diamond-tipped blade on a moist noticed or angle grinder provides the very best outcomes.
- Slab or Giant-Format Tiles – Slab tiles, typically used for luxurious wall or ground finishes, require cautious handling. Use suction pads for lifting and a moistened notice for exact cuts.
Skilled Ideas and Security Precautions
Whereas inexperienced persons can carry out tile chopping, it’s still important to practice full safety and warning when participating in a job that requires heavy tools. Listed below are ten important suggestions to bear in mind:
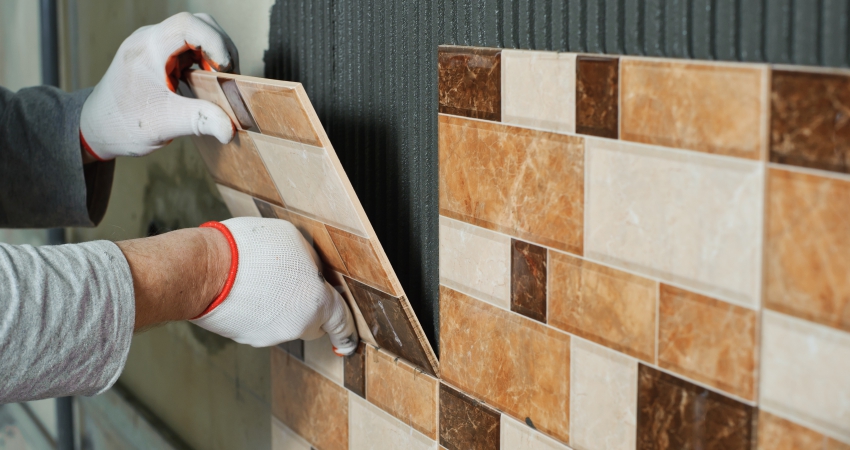
- Put on security goggles, Reduce Tiles, and defend your eyes from the particles and filth.
- Always use gloves to protect your hands from cuts and scrapes.
- For the reason that the workspace will likely be dusty, it might be good to work in an open space or use a fan to filter the dust.
- Ear safety will also be useful, primarily when working with energy instruments.
- Don’t rush. Take your time and be an affected person with the method, particularly if you are new to it. Slowly finishing the duty additionally provides the benefit of keeping your palms regular throughout the process.
- Urgently, the tile is too onerous, whereas chopping might end in tile breakage.
- Correct markings are all the things. They’re the ultimate contributors to the general visible attraction of the area. Minor errors can result in gaps and waste.
- Don’t skip the step of smoothing the tile edges. Most cuts or accidents occur when the perimeters are tough and uneven.
- Follow on further tiles! You could take a look at cuts on leftover tiles to improve your method.
- Study by watching movies and a tile-chopping tutorial, if desired.
Conclusion
Reduce Tiles. Reducing tiles effectively is vital to reaching flawless, sturdy installations. It’s a necessary talent to have that can improve the overall look and complete a great aspect of your tiling project. Guarantee you choose the suitable tiles and instruments for the job. At Orientbell Tiles, we provide versatile and classy tile options to go well with each area and want. Our consultants are able to provide information to you through the method and assist you in choosing tiles that are straightforward to work with and completely suited to your mission.
